Sometimes you need to enable additional logging when you are troubleshooting a particular component in Windows. Group Policy Preferences includes the ability to create verbose debug logging for each included client-side extensions. You activate Preference debug logging through Group Policy. Preference debug logging policy settings are located under the Computer Configuration\Policies\Administrative Templates\System\Group Policy node when editing a Group Policy object. You can individually enable each preference client-side extension. Logging and tracing entries provide you with a several configuration options including what type of data to write to the event logs (Informational, Errors, Warnings, or all), enable trace logging and the location of the trace log file, and the size of the file.
 You can configure the location of the trace files; however, keep in mind that file system permissions changed on Server 2008 and Windows Vista. Make sure permissions do not interfere with creating the log file. You’ll notice the default location for all three log files is
%COMMONAPPDATA%\GroupPolicy\Preference\Trace. The variable
%COMMONAPPDATA% is not recognized by Windows, however; it is meaningful to Preference client-side extensions. Preference client-side extensions recognize this variable and expand it according to operating system on which the client-side extension is installed. For Windows Server 2003 and Windows XP, %COMMONAPPDATA% expands to
%SYSTEMDRIVE%\Documents and Settings\All Users\Application Data. The equivalent path for Windows Server 2008 and Windows Vista is %SYSTEMDRIVE%\ProgramData (this folder is hidden by default, but you can manually type the path in Windows Explorer).
Logging and tracing missing from RSAT
You’ve installed Windows Vista Service Pack 1; you’ve downloaded and installed RSAT. You try to enable Logging and tracing, but it’s not there. Well, there is a reason for this.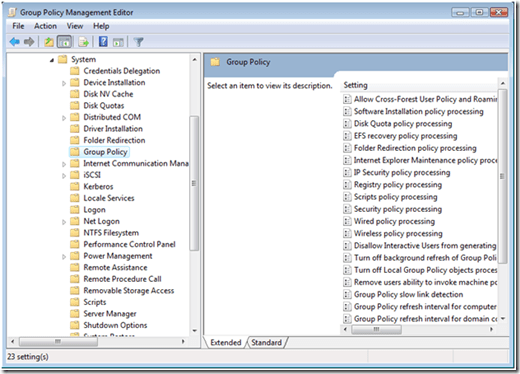 Administrative Templates show in the user interface because of two files: an .ADMX and an .ADML. Logging and tracing does not appear because the GroupPolicyPreferences.admx and .adml files are not included with RSAT. You need to copy these to your local or central store.
You have two options as to how to get a copy of the Group Policy Preferences ADMX files. You can download the entire Windows Server 2008 ADMX file set, or you can download just the Group Policy Preferences ADMX file set. You can download the installer for either of these file sets from http://www.microsoft.com/downloads/details.aspx?FamilyID=927fc7e3-853c-410a-acb5-9062c76142fa&DisplayLang=en. These MSI applications install their contents to the default location of %PROGRAMFILES%\Microsoft Group Policy.
The Group Policy Preferences ADMX installation creates an additional folder named Preferences, which contains a single ADMX file with multiple locale folders. You want to copy the GroupPolicyPreferences.admx file into your policydefinition folder. If you are using a central store, then you must copy the file to the policydefinition folder on SYSVOL, otherwise; copy the file to your local store. You’ll then want to copy the .ADML file to the corresponding locale folder located in your policydefinition folder. See the Managing Group Policy ADMX Files Step-by-step guide for more information on managing ADMX Files and creating a central store. After you’ve copied both the .ADMX and .ADML file into the proper store, then close all instances of GPMC and its editor. Restart GPMC and edit the GPO in which you want to add Logging and tracing policy settings. Expand the nodes under Computer Configuration and you should now see Logging and Tracing options.
– Mike Stephens
